Feeds:
Posts
Comments

Archive for the ‘Craft Projects’ Category

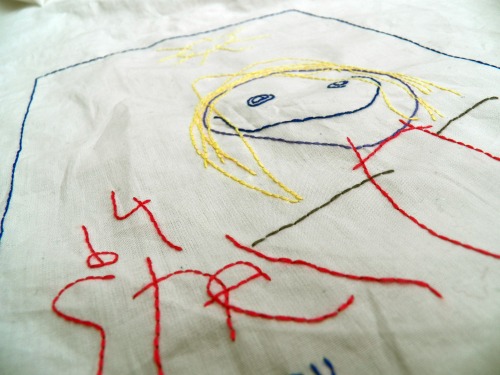
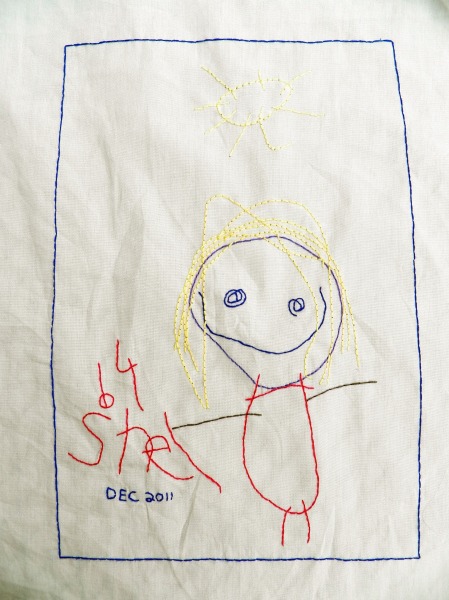
I’m working on a large embroidered collage project and wanted to include one of my daughter’s drawings on it.

I first saw this idea a few years ago and have just been waiting for my daughter to get old enough.

As far as projects go, this one was pretty easy.  I had Shelby draw a picture (that says “Shelby” not “by Shel”), then I scanned it in and printed it in mirror image and used a heat transfer pencil to trace over the design and iron it on to my fabric.  I find that is far easier than trying to trace directly onto the fabric or on the back of the pattern using a light box.

I stitched over the pattern using the exact colors that she used in her original drawing.  I think it turned out well and she’s impressed that her artwork is included on the collage.

Read Full Post »

I made yet another altered canvas.  Because I have a problem.  “Hi.  My name is Mary and I can’t stop putting crap on canvas.”

Read Full Post »

I have to make a confession.  Anytime I go to a thrift store (which is embarrassingly often), I make a bee-line for the button bin.  I love collecting buttons.  I just don’t like talking about my buttons because … well … to be honest, it’s a little boring to look at peoples’ button collections.

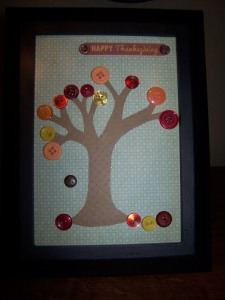
So I won’t show you my (vast) button collection.  But I will show you something I made with my vast button collection!

I am sincerely hoping that, since I didn’t make you suffer through a tour of my buttons, you will forgive my pictures being dark.  I keep forgetting to take pictures of this during the day and indoor winter photography is very hard for me.

But I digress.  The tree template is actually a Halloween quilt pattern from my friend Missie at The Quilt Stop here in town.  http://myquiltstop.blogspot.com/ 

I took a 5×7 frame from Dollar General and removed the glass.  Then I glued some background paper to the back part of the frame, glued down my tree and then buttons and finished it off with a “Happy Thanksgiving” sticker.  Which is all pretty self-explanatory.  Have fun making yours!


Read Full Post »

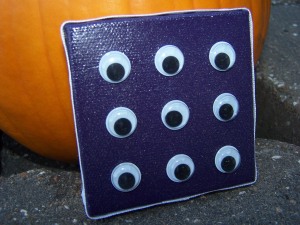
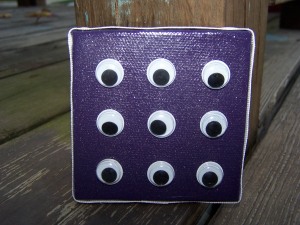
I will admit that I am probably playing fast and loose with the word “art” here.  But specimen art is all the rage now and I just had to join in. 

I used an artist canvas about 3 inches square and I spray painted it with purple spray paint then glitter paint. 

Then I just tacky glued my google eyes on and put a ribbon around the edge to finish it off.

I know you’re jealous!

Read Full Post »

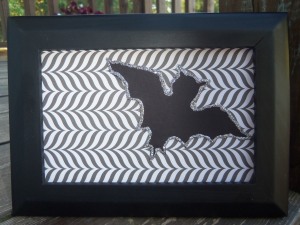
I’ll just get right down to it because I see no way to be more descriptive of this than “bat silhouette.”

I got the 4×6 frame at Dollar General (I usually have a stash of them because they look fairly nice and only cost 2 bucks) and took the glass out.

Then I cut my background paper to size and cut out a bat silhouette.  I got the template from MarthaStewart.com.  You should really check it out – she has hundreds of Halloween silhouettes.

I finished my bat off by outlining him with silver Stickles.

As far as Halloween crafts and decor, I don’t see how you can get easier or cheaper than that!

(I’m not going to insult your intelligence by posting a tutorial picture of my scissors, glue, paper, and Stickles.  You are welcome.)


Read Full Post »

It’s hard to know how to begin a new post after such a long break.  I thought about apologizing for abandoning all my faithful readers … but that seemed a little … not humble.  I mean, who am I to think that my absence would inconvenience anyone?  Right?  So we won’t go that route …

Then I thought I’d tell you about my recent trip … but that might be kind of boring.

So I think I will tell you about the day I ran out of things to glitter.  It was a dark day indeed.

Of course, darkness only prevails if you let it.  So I did what any normal person with crafters’ block would do … no, I did not go to Wal-Mart.  When has that ever helped anyone?  Did I run around town waving my arms and screaming?  No, I did not.  Did I call Dr. Phil and ask for his advice?  Well, I did try that.  But, when that didn’t work,  I went to Etsy and did a search for “glitter.”  (On another note, “squirrel” and “bacon” searches always yield entertaining results.  “Michingan”?  Not so much.)

Anyway, where was I?  Oh yeah.  Etsy.  I searched for glitter and found someone who had glittered the soles of shoes (not to be confused with “souls of shoes” because, obviously, shoes don’t have souls – that we know of).

Having an inflated sense of my own abilities, I thought, “Self, you could totally do that!”

So I did.

Here is the “before” picture of my incredibly uncomfortable shoes (the incredibly uncomfortable part has nothing to do with the glitter).

And it wasn’t really a “before” picture so much as a “front” picture so you could see they were just normal every day shoes.

Here’s the glitter part.  I think it looks pretty cool.

All I did was use a paint brush to apply glitter to the bottom of the shoe – don’t apply it to the parts that will come in contact with the ground – and the inside of the heel.  Then just sprinkled fine glitter on them.  A word of warning, I first tried this with some velvet-y pumps and the glitter sticks to the velvet pretty bad.  It will come off with work, but it’s a pain in the neck.

There you go – one more thing for you to glitter!

Read Full Post »
I had this song stuck in my head the other day.  And was in the mood to stitch handcuffs.  (You’ve been in that mood before, don’t deny it.)  So here it is.

I mounted this on an artist’s canvas.  I put a piece of batting between the canvas and the stitching.  The batting isn’t necessary, my mother doesn’t do it.  But her knots are nicer than mine and she doesn’t need it.  To give it a more polished look, I glued grosgrain ribbon around the edge.

I never thought I’d be giving embroidery instructions because I’m not exactly an expert.  But I’ve been noticing in blogland that some people transfer patterns the really really really hard way. You can trace your pattern over a light board (or do it in various other even harder ways), but I prefer to scan it in to my computer and then click on “mirror image” in the print options.  Then you can trace over your design and just iron it right on to your fabric.  For this particular project, I typed the phrase out in a word document and printed it as a mirror image.

Just thought I’d share that tidbit for anyone who doesn’t know.

Remember, in 2011 I will be donating 75% of my Etsy sales to my church’s mission trip to Haiti.  Please check it out at http://www.marybt.etsy.com.  I will be adding some new things this week that I’m really excited about.

I am linking up over to http://www.bedifferentactnormal.com .  Go check it out – you will find some really great links!

Read Full Post »

*This post is dedicated to my blog friend Patty over at Pip Stitch (http://pipstitch.blogspot.com) because she shares my incredible love of buttons.

I’ve been seeing button art popping up all over the place lately.  I dragged my heels on trying it because it looked like it would be a pain in the neck.  But it really wasn’t.  Here is my pink and purple button art.

I didn’t spend a lot of time laying out each and every button.  I laid out some big ones to make sure I had enough.  Then it was just a matter of gluing them all down.

This is a 5×7 canvas.  I used my Cricut to cut a 5″ egg (because I cannot draw), I traced around the template onto the canvas and then just started gluing buttons!  I started with large buttons and then used smaller ones to fill in.  I finished off the piece by gluing some grosgrain ribbon around the edge.  Because I love grosgrain – especially since I learned the proper way to pronounce it!

I also did one in green and pink.  With green grosgrain ribbon to finish it off.

I am sharing this post over at http://www.bedifferentactnormal.com – go check out Show and Tell Saturdays, I promise you will find some great stuff.

 Please check out my Etsy shop at http://www.marybt.etsy.com as I will be donating 75% of my proceeds in 2011 to my church’s mission trip to Haiti.

Read Full Post »

Oh, yes, it’s another altered canvas.  You know how I love making them!  This one is for my bedroom.  (*Please note: this is not to be construed as an open invitation to all my blog readers.)

It’s 8×10.  I made the heart banner with a paper punch, bakers’ twine, and some scrap paper.  The lettering is just regular Scrabble tiles.

Read Full Post »

Here’s a really great homemade gift idea for the kids on your list – couple it with a coloring book and everyone will call you Martha.  My daughter calls this “fixing my broken crayons.”

These are very easy to make.  Take your broken or unwanted crayons and remove the paper label.  Soaking them for a few minutes in warm soapy water will make that easier.  For the really tough labels, I used a paring knife and just peeled it off – I think that was easier than soaking them. 

As for melting the crayons, there are several methods – and each will give you a slightly different result.  For these, I melted the crayons in a small loaf pan set in a larger pan of water on the stovetop.  When they were melted, I poured the wax into a Christmas tree ice cube tray that I picked up at the thrift store for 50 cents.  Let them cool on the counter until they are hard and then put into the freezer so they will release from the mold more easily.  But don’t cool them in the freezer, they crack.

I put them in a cellophane bag and made a little topper with scrap paper and a Sharpie.  Ta-da!

Helpful hints about color: I used various shades of red, pink, blue, and purple for the purple crayons.  I also added white to soften the color a bit.  Same with the green (except I used blues, yellows, and greens obviously).  By the time I got to the red ones, I was out of red crayons.  But various shades of pink, orange, and a touch of brown combine nicely to make red.

Read Full Post »

Older Posts »