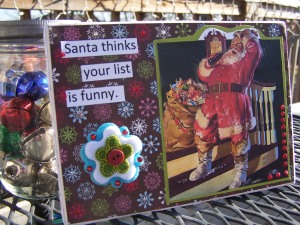
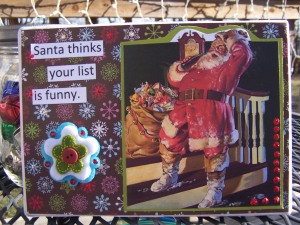
I made yet another altered canvas. Because I have a problem. “Hi. My name is Mary and I can’t stop putting crap on canvas.”


Posted in Craft Projects, tagged Christmas canvas, Christmas craft, handmade Christmas decor, handmade Christmas gift, Santa Claus craft, Santa Claus laughing on December 10, 2011| 2 Comments »
I made yet another altered canvas. Because I have a problem. “Hi. My name is Mary and I can’t stop putting crap on canvas.”


Posted in Craft Projects, tagged easy Christmas craft, easy crafts, handmade Christmas gift, handmade gift on November 22, 2009| 4 Comments »
I have been hard at work making Christmas gifts to share with you!
This evening’s easy Christmas gift is an altered photo album. Who doesn’t need a photo album? Think: Mothers, Daughters, Grandmothers, Friends, Hair Dressers, Cleaning Ladies, UPS Delivery Drivers, pastors, the list could go on forever and ever. Just adapt your design to your desired recipient.
This is one I made for a friend with 2 sons.

(It’s not wrinkly, that’s the glare of the plastic cover.) I bought a 4×6 photo album at Target. Get the kind with the paper design in the front which can be removed. All I did was cut my background paper to the size of that already provided. (Actually, I cut it just a smidge smaller because I knew I would be using dimensional embellishments so I wanted to be sure the new cover would fit in the album. Then I just decorated the background paper. I finished off the album with a piece of jute tied around the spine. I think that little touch really brings the whole design together.
There you have it! An easy boutique-quality Christmas gift that you can make yourself!
Posted in Craft Projects, tagged altered wood ornament, handmade Christmas gift, wood ornament on December 11, 2008| 6 Comments »
As promised, tonight I am bringing you a guest crafter. My friend Joy made these darling wood Christmas ornaments.


Aren’t those great? Okay, here’s how she did it. She bought the pre-cut wooden ornaments; you can get them unfinished at any craft/hobby store. Next, she traced around them on a piece of patterned paper and cut out the shape. Then Mod-Podged the paper to the ornament and glittered over the top. How easy is that?
I’m not sure if I’m allowed to spill the beans on this but, since she told me, I guess she won’t mind … She plans to make oatmeal cookies, tie them up in a little bag and attach the ornament to the bag. I sure hope I’m on her gift list!
Thank you, Joy, for providing me with Part 7 in my series!
Posted in Craft Projects, tagged altered frame, handmade Christmas gift on December 2, 2008| 5 Comments »
Welcome to Parts 3 and 4 of my Easy Handmade Christmas Gifts series. I decided to combine these 2 posts because my brain is racing with so many posts that I want to make.
The first item was kind of an accident. Last night I intended to make some of these door hangings that I saw on someone else’s blog. (I can’t remember which blog though so I can’t link to it.) Anway, they were really cute and she had taken a picture frame and then attached ribbon and flowers and stuff to make a door hanging. Well, I set out to accomplish that and this is what happened.

I have to confess … I think it turned out pretty cool. And I really think the pink glittery balls just scream “THREE WISEMEN!!!!!” I used glitter spray paint on a cheap navy blue picture frame I had gotten several years ago at Dollar General and had stashed away in a closet. There are some imperfections in the glitter; I got a little carried away with it – what with the pink balls screaming about Magi and all. I used Staz-On ink in cotton white to stamp my Wisemen and star directly onto the glass of the frame. I then embossed it with a holographic embossing powder. Next, I cut a piece of dark paper to size and framed it. Finally, I hot glued my floral pics onto the side. While I heart Tacky Glue, hot glue really works better for attaching bulky items like floral pics to picture frames.
It’s nowhere near what I set out to create, but that’s where my imagination took me and I was really happy with the final result.
The second item is some ebroidered napkins. A word to the wise: do not attempt to make these as gifts unless you are a more talented embroiderer than I am. I originally intended these to be a gift, but I can’t in good conscience give them away; I’m not a stitcher.

I made 4 of the blue and 4 of the red. I got these pre-stamped napkins on clearance at Wal-Mart one January for $2.00 for 4. I think you could use a rubber stamp to stamp your design on the napkins and then stich over it.
By the way, if any of you all use any of these ideas, I’d love to see your versions.
Posted in Craft Projects, tagged altered candle, Crafts, handmade Christmas gift, Random on November 27, 2008| 3 Comments »
I hope you all had a wonderful Thanksgiving! We have so much to be thankful for.
It’s time for Part 2 of my Easy Handmade Christmas Gifts Series. Today I will be showing you an altered candle. These are great because they look very elegant but are so easy and inexpensive to make.

For this project, you will need:
1 pillar candle (Walmart has some in their Christmas aisle for about $2)
1 sheet of tissue paper in the same color as your candle
A dye ink pad (you don’t have to use dye ink but it’s better as pigment ink will have a tendency to run on you)
Rubber stamp
Craft heat gun
Ribbon and any other embellishments you might like
Glue
First, you will stamp your image onto the tissue paper. You can use any color of candle, but the tissue paper needs to be close in color to the candle so that it blends in well. Then trim around your image. I did several of the same image for this candle, but if you have a large image, you might just want to do one. Next you will hold the tissue paper against the candle. If you want to, you can use a very tiny dot of glue to hold it on; I have found, however, that the static electricity from taking the wrapper off the candle is enough to hold the tissue paper for my purposes. Use the heat gun to melt the tissue paper onto the candle. You will want to rotate the candle a bit as you melt the wax so that you don’t get runs in your candle. If you do happen to get a run, just reheat the area with the craft gun and rotate the candle until the run disappears.
Once the wax has cooled (about 2 minutes), you can embellish your candle further in any way you like. I glued sequins into the middle of the snowflakes. For this one, I used Tacky Glue but, in retrospect, I think hot glue would have worked well also. I then used my red Stickles by Ranger (glitter glue) to put little glittery dots at the end of the snowflakes. Finish off by tying a pretty ribbon around the candle.
Some other ideas you might consider:
I have stuck floral picks behind the ribbon to add a little dimension.
You can spray the candle with glittery spray paint to add a little glitter. (I’m a fool for glitter – anything tacky really – you’ll notice that I put a little red glitter on the top of this candle.)
You don’t have to use the tall pillar candles. You can use shorter candles, votives, etc.
The possibilities are endless! Pair this with a small glass charger plate, wrap in a cellophane wrapper with a pretty ribbon and you will have a wonderful Christmas gift!
Posted in Craft Projects, tagged bookmark, Craft, handmade Christmas gift on November 24, 2008| 4 Comments »
Do you ever have people tell you, “Gee. I’d love to make some Christmas gifts, but I’m not very crafty and I wouldn’t know where to start.”? I get that a lot. Probably because I’m kind of seen as a miniature Martha Stewart around the blogosphere. But nice homemade gifts do not have to be difficult or expensive. Thus, my Easy Handmade Christmas Gifts Series. I’m not sure how many crafts I’ll put up or how often, but you can rest assured that there will be at least 2. Probably more as I root around in my scrap room closet for the supplies for all those projects that I’d “get to later”. I’m sure I’m the only one who has a closet full of that stuff. Right? Not! (Sorry, I regressed to the ’90’s there. Forgive me, I can’t help myself.)
Anyway, on to today’s project. This will be perfect for the reader in your life. Couple this handmade bookmark with a gift certificate to her favorite bookstore and a box of tea bags and you will be the hit of the Christmas party!

I got these rectangular pieces of acrylic at a rubber stamp convention. (Shut up! You know you want to go to a rubber stamp convention!) They measure 1 1/2″ x 5″. But I have heard that you don’t have to get them at a fancy rubber stamp convention. Supposedly, your local hardware store will probably carry acrylic and will probably cut it for you. But that’s hearsay, so don’t tell them I sent you or anything.
I mod-podged a piece of patterned paper onto the back of the bookmark (the pattern goes against the acrylic so it’s like you are looking at it through a window) then I inked the edges with pink pigment ink. While the ink was still wet, I sprinkled sparkly pink embossing powder on it and set it with my heat gun. I punched the hole in the top with my Crop-A-Dile. One note here, when I used my Crop-A-Dile on my practice piece, the acrylic cracked sometimes and sometimes it didn’t. Therefore, I would recommend backing the bookmark with a piece of tape before punching your hole and then removing the tape.
I finished off by stringing a piece of ribbon through the hole and adding a little snowflake embellishment. The embellishment is from my stash, so I can’t remember who made it. It was probably either from Spare Parts or Making Memories.
There you go. An easy handmade Christmas gift that won’t break the bank and that is entirely useful and un-tacky.